The initial setup of a working environment for building any software projects is always a big pain especially for beginners. In this article I will discuss about the initial setup you should have to work on Django based projects.
Command Line Tool
The command line tool is extensively used by the developers. By using it you can easily install and configure your projects. However, you don't have to install it. It's already available in your computer.
If you are a Mac user you can use Terminal (a command line tool) which is located at /Applications/Utilities/Terminal.
If you are a Windows user you can use Windows PowerShell (a command line tool) which is located at /Programs/Windows PowerShell
Install Python
Django is a Python based web framework. So, you need to install it first. For detail instructions of installing Python check the following articles based on your operating system:
Install Pipenv
As a developer you should have separate virtual environments for every Python based project so that project-wise dependencies can be managed separately. Pipenv is a Python's officially recommended tool for managing Python packages and virtual environments.
For detail instructions of installing Pipenv check the following article which also contains some basic usage of Pipenv.
Install Django
Now your system are ready to install Django. Let's create a new directory (named hello-django-project) first where the new django project will be created. Type the following commands to create the new directory and enter into that directory.
# create directory 'hello-django-project'
$ mkdir hello-django-project
# change to 'hello-django-project' directory
$ cd hello-django-project
To install Django using Pipenv run the following command.
$ pipenv install djangoWith this command, a fresh Django has been installed with a separated virtual environment for your project. To check look at the directory you can see two files are already created there (Pipfile and Pipfile.lock) to manage the project dependencies.
However, you need to activate the virtual environment. To activate the virtual environment for your project run the following command.
$ pipenv shellIf you want, you can check the Django version by running the following command. You should see the django version (in this example it is 2.2).
$ django-admin --version
2.2
If you want, you can also locate the virtual environment of your django project by running the following command. You should see the location of your project's virtual environment.
$ pipenv --venvSo, you have Django installed properly in a separated virtual environment and virtual environment is also activated. Now, you are all set to start a new Django project. In the activated virtual environment, create a new django project by running the following command.
$ django-admin startproject hello_django .Look at the ". (dot)" at the end of the command (it is optional). If you omit the dot then an extra directory will be created to wrap the new django project, otherwise the new django project will be created in the current directory without creating an extra directory. That's it, nothing more!
At this point you should see the following directory structure.
└── hello-django-project
    ├── manage.py
    └── hello_django
        ├── __init__.py
        ├── settings.py
        ├── urls.py
        └── wsgi.py
    ├── Pipfile
    ├── Pipfile.lock
To see Django project is working properly, let's start the Django's local web server by running the following command.
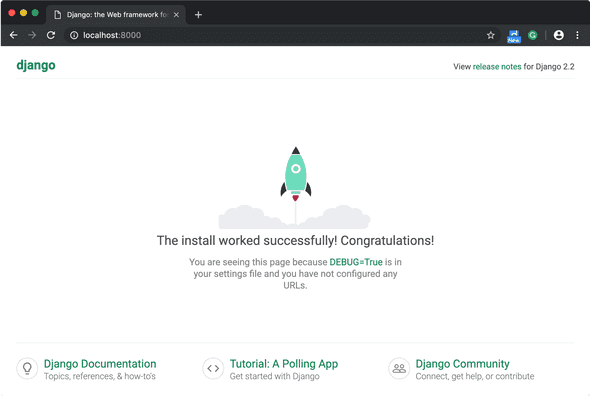
$ python manage.py runserver Now, in your browser type http://localhost:8000/ and you should see a congratulations page as shown below.

Cool! You have successfully installed a new Django project.
To exit from local web server press Ctrl + C together.
To deactivate a project's virtualenv or exit from a project's virtualenv, type $ exit and hit Enter key or press Ctrl + D together.
Install Git
A version control system is considered as a must tool in a development environment. Git is one of the most powerful and widely used version control system.
To install Git on Mac run the following command via Homebrew.
$ brew install gitTo install Git on Windows go to the download section of Git website, download the installer for Windows, and run the installer to install it.
After installation, you need to configure Git with your name and email address. It is a one-time setup. Whenever you make a commit these credentials will be associated with that.
$ git config --global user.name "Your Name"
$ git config --global user.email "email@example.com"
This configuration can be changed anytime by typing the same commands with new name and email address.
Text Editor
Now you need a text editor for writing your code. There are many text editors available like Atom, Vim, Emacs, Visual Studio Code, etc. Download the text editor you like, and install that. Personally I like both Visual Studio Code and Atom. But it's up to you which one prefer most.
Summary
Initial setup of a working environment is always a headache for beginners. By following this article you can setup your working environment to work on a django project.
Happy coding!
Comments
You are welcome to write comments, suggestions, corrections, or any queries related to the article. Your comments may take some time to be appeared. Please be aware that any irrelevant comments will be deleted. Thanks for your understanding, and your respectful & relevant comments!